Showing posts with label cabinets. Show all posts

Monday, November 15, 2010

The Light

0 comments
At the end of the tunnel! Its visible! The kitchen project that never ends is nearly over. The "TO DO" list would fit on one hand these days. I have a secret plan to be finished with ALL of it over the Thanksgiving holiday. That will be appropriate because we kicked off this project with a trip to the fancy lumber store over the Thanksgiving holiday in 2008. The remaining items:

1) Make a kick board for the peninsula.
2) Make a little spacer block for the crown molding. (5 min tops)
3) Route out the glass doors and assemble them.
4) Order the glass.
5) Trim, route, and assemble the remaining frames for drawer fronts.
6) Stain items 1,2,3, and 5.
7) Attach spacers to drawer fronts.
8) Install all that stuff.
9) A little caulk maybe.

Okay two hands.


Friday, June 25, 2010

For love of a pin nailer.. (continued)

0 comments
We've put that handy pin nailer to use on another issue - cabinet crown molding.

Why I insisted on included crown molding above the upper cabinets? I don't know. Having those cabinets go straight to the ceiling would've been just fine... but, you know, hindsight...

We (I?) fretted about the process for months off and on. Remember what our crown molding motto is? "Cut close and caulk". Yeah, doesn't work so well on stained molding. Remember Franken-corner? Oh the horrors... Anyway, I'll spare you the drama and details but we made one hugely smart decision on this crown molding: to cut it out and assemble it on the ground, not in the air like we normally would. This way the corners look perfect.. Certainly there are gaps and imperfections in other places (small ones, August is still a perfectionist), but the corners are PERFECT.

And we of course used the pin nailer to attach the pieces, so you can't even see the little holes.


For love of a pin nailer

0 comments
Alternately titled: Look at what we did in the month of June!

We have done some fun stuff these past few weeks, such as FINALLY getting started on those pesky cabinet doors. In retrospect, the process we selected to make our very simple doors is NOT very simple. Well, it kinda is simple but its VERY time consuming: cut out panels -> stain front (x3) -> stain back (x3) -> polyurethane front (x3) polyurethane back (x3) -> cut out frame pieces -> assemble -> stain (x3) -> poly (x3). Doesn't take a math whiz to know that all those "x3"s equals a very drawn-out process. Regardless, we have pushed about half of the doors through about half of that process... And here is where I mention the nifty tool we needed to "expedite" things - a pin nailer.


It literally nails with pins, headless pins at that. They are TINY. So, here's a shot of pin nail use in the cabinet doors:

This way, the pins hold the doors while the glue dries, no need for dozens of clamps. Here's the doors underway... Frames still need staining.


Friday, February 19, 2010

The Final Cabinets

0 comments
After much ado, the last two cabinets are in their final resting places. Getting them done was a challenge b/c the insides had to be stained, and the outsides, and the bottoms, etc etc. Plus they had to have special alder shelves built, stained, etc. All because I wanted to have some of those fancy glass doors. Its the special details like this that really make a project drag on... and on...

But, we persevered. And getting them mounted meant we could finish several other things: the backsplash, and the undercabinet lighting, which means I can use my garbage disposal again. Yipee!

So what remains? Oh mainly just the doors - all 39 of them. Crown molding... and... ya know that's about it. Maybe we will finish this project one day.

Thursday, February 11, 2010

Things You Can Use an Iron For

0 comments
There are two major functions in cabinet making that require the use of your iron.

#1) Edge banding

This is how you turn a piece of plywood into a faux slab of solid hardwood. The lumber yard here sells pre-made rolls of edging material. It almost looks like wood tape, conveniently coated with heat activated glue on the back side. So, lay the strip down where you want it, cut it to size, apply the iron, press hard, that's about it. Then you have to trim the edges a bit to get the look of perfection, but they sell tools for that (the yellow thing). In this pic I think we've edged the sides of the cabinet but not the back.


#2) Dent removal

This trick is the coolest if you've managed to bang up, scratch, or dent your nice expensive raw wood. Set the iron on the highest steam setting. After its warm and steamy, let the steam from the iron soak into the dented part of the wood but don't press the iron directly on the wood. If the wood is just dented, then the damage will magically disappear before your eyes. MAGIC. With scratches, there will also be a major improvement but probably not perfection. This whole process takes just a few seconds. Its a no-brainer on solid wood, and while the internet advises against this for plywood, I've done it several times with great results. I haven't tried this on finished wood, also not recommended by most, but I will one day, just to see what happens.

Tuesday, February 2, 2010

A Groundhog Day Resolution

1 comments
Be it known that I am hereby resolving to update this blog more regularly. Let's put a number to it: twice a week. That's right. Call me craaaazy but important milestones in the journey towards our finished kitchen are being missed, lost forever.

Here's a major milestone: All 8 drawers are designed, constructed, assembled, and resting peacefully in their forever homes. I thought this would be a major ordeal, but we impressed ourselves by getting all that done in the span of a week or so. How did we do it? Well first we nixed the "dovetail" idea. That would've been a nice touch, and a major time sink. Second, the fancy Blum drawer slides we bought are, simply, a work of engineering genius. They are SO nice. They work perfectly, with tolerance for error built in on all dimensions. And they install in a snap, even without purchasing the pricey Blum installation jigs. They even have a soft-close feature, which I'm sure will add major $ to our bottom line when we go to sell this place. Check this out:


Here's something else that's pretty cool. We made one of the large desk area drawers in to a file cabinet. August just loves filing things and keeping them forever, so this will be perfect for us.


That's all for today folks. I can think of at least 2 more important blog posts that need to go up, and more topics are coming every day. I think we've finally found our long-lost motivation... more on that later!

Monday, December 7, 2009

Milestones

0 comments
We are getting there! Not quite time to roll the credits but we really are making progress.. Well we were anyway. One milestone that is majorly in the way is - my LAST week of school. And the requisite LAST projects. Regarding the cabinet project though, we have finished the following things:

The LAST cabinet box
The LAST face frame - in fact we have even drilled the LAST pockethole
The LAST shelf built

Okay that's all I can think of for now but I'm still excited about it. :)

Wednesday, September 2, 2009

Progress

3 comments
It was a bit of a saga but the countertops in the main part of the kitchen are installed, grouted, everything. The drama? Turns out that its hard to be precise and perfect when you are working with a substance called "mud". Used to having everything right down to the 1/64th of an inch, tiling was a little out of our comfort zone. Some of the grout lines were larger than they should be, some of the junctions weren't quite lined up, some of the tiles are slightly lower than some of the other tiles. However, the nice black grout went in and it fairly well smoothed everything out. And even August thinks that everything looks okay now.

And as of last night, even the sink is installed. hallelujah! The desk area (i.e. kitchen annex) is also *almost* done. Should be done by Friday. What in the world will we do with our 3.5 day weekend?? I'm sure will think of something. Shelving is high on my priority list.


The desk area...

And a random shot of me, to prove that I do occasionally do some work myself.

Wednesday, August 5, 2009

The Fridge Cabinet

2 comments
We have officially cleared the biggest cabinet installation hurdle of all - {ominous music} the 24" deep over-fridge cabinet. Why so challenging? Well, being very conscious of our limited kitchen space, I only left a half inch of spare un-utilized wall in the design. Second, this cabinet is giant - it had to be hung from the ceiling as well as the wall. Third, perfection is key here. Everything needs to be square, plumb, level, lined up, etc etc, or else the fridge may not fit at all....

There were some tense moments for sure but its all done now. Of course we won't be test fitting the fridge so fingers crossed... I'm sure it will be fine...

The picture above is August's bracing just before cabinet installation. If a 400-lb gorilla ever wants to move in up there, he will be a-okay. (Can you see the duck sticking its tongue out at you? I was quite amused...)

Of course, it ended up being a tight fit and we actually had to grind off some of the screw heads. And slick it up with bar soap. And give it a few good whacks. The finished product looks pretty great though.


Friday, July 10, 2009

A Little Help from the Fam

1 comments
We have had three visitors for the past few days so we've lots of sightseeing and a little kitchen work as well. Hanging the giant three-cabinets-in-one thing was something August and I definitely couldn't do by ourselves. But, its done now!


We also did the ultimate Colorado tourist attraction: Pike's Peak. (Our first fourteener!! ha ha ha). At 14,110 feet, the weather was alternating between snowy and sunny, and the temp was in the 30's. Cold!! The whole visit was a blast though, and we very sorry to see them go.


Friday, May 1, 2009

At Last...

0 comments
Found the camera, school finally wrapped up for the semester, healed from recent sickness (not swine flu...) --> time to update the blog!

We've been working feverishly, semi-feverishly anyway, as we really can see a glimmer of light at the end of the tunnel. There's much to show off but I will try to keep it interesting.

First, ALL the baltic birch boxes are DONE. ALL the face-frames that are needed for now are also done. In other words, there is no cabinet construction left to do before we start the demolition process. Break out the crow bars!!

Now I will show you the process behind our mammoth pantry cabinet which we just finished last night. This thing is a "hoss" (sp?). It will, like, quadruple, the available storage space in our kitchen. We had to build it in three separate boxes:
With one big fat face-frame:
No you get the idea. Note that we had to assemble it in the living room because the basement ceiling is only 7.5 ft high. When I say this thing is floor-to-ceiling, I am not kidding around.
Final box installed, there were some tense moments leading up to this photo.

Here the cabinet is upside-down, getting some additional screws.
Final touch: feet! All the floor cabinets have these now. They are each independently adjustable and this will help keep the countertop level while the floor rolls up and down wildly.

Thursday, March 26, 2009

Look What's Finished

0 comments
Yeah, not the whole project.. sorry if I got your hopes up! Instead, its only our incredibly complicated two-sided-entry no-visible-screw-holes peninsula, complete with two fake doors. Next up: Wall cabinets and the challenges that come along with crown molding, under cabinet lighting, etc etc etc...


Saturday, February 21, 2009

No time to blog

0 comments
Sorry for the prolonged absence - we've been so busy trying to work out staining issues. First of all, the originally chosen stain system turned out to be a dismal failure. Being a poly-stain it was already finicky, but combined with the low humidity we had a total disaster on our hands... Spent the better part of last weekend selecting a new stain. Here is the result of much testing:

+ + = GOOD! (good enough...)

That means the stain alone is 3 coats, plus another 3 coats of water based polyurethane, several rounds of light sanding.. Its a time intensive-process. At least these water based products dry on a scale of minutes rather than hours.

Here's some pics. PS We have a lot of cleaning to do before company arrive
s in a week!

Tuesday, February 3, 2009

Couple of Pics

3 comments
More progress - only one face-frame remains

We take pocket-hole joinery to the extreme!!

Monday, February 2, 2009

Quick Update

1 comments
Just wanted to make a quick update to the world. First of all, the winner of the stain contest turned out to be "Maple". I realize that, technically, "Pecan" won the poll by 2 votes, but I'm pretty certain you all would have voted for Maple had you had access to the real-life samples they have at Lowe's. The Maple looks great with both the floor and the mantel. Also, August did the staining this time and it looks much better than my work. I suppose I will remain in my roll as "assistant", all the way to the end.

The cabinets are coming along as well. We lack two face-frames from being done with the construction part of all the floor cabinets. We'll probably crank those out today and tomorrow. After that, we have to route a groove into some of the frames, which will require us to first setup and learn to use the router. And then the sanding/staining, and then assemble.

And that means we are roughly approaching the half-way point. That's no so bad, eh?

Wednesday, January 21, 2009

Stain?

1 comments
Its time to select a stain, folks. Consider the challenge:
  • Winter time - freezing garage
  • Basement houses the furnace i.e. blow fumes all over the house
  • A tight schedule - self-imposed but hey, its not that fun storing all your kitchen stuff in boxes on the floor
  • Open floor plan - kitchen is effectively in the living room with its wood floor and lovely mantle
  • Stainless appliances and hardware
What's our solution??? - {drumroll} water-borne polystain... Its a multi-tasking solution for sure. Water-based, so no fumes.. Dries super-fast in our zero-humidity climate. Beyond that, think of it as tinted polyurethane - stain and protection rolled into one. The downside is, its a little unforgiving, easy to leave brush strokes that end up VERY visible... The other downside is the cost.. sigh...

So, want to see the first test sheet?
The left side is one coat, the right side is two. Its hard to tell from picture, but two coats are a definite improvement over just one. I don't know, maybe too redish again? Its not a horrible clash with the mantle or floor, but I wonder if we could do better. Here are some of the options available in the polystain:

......Fruitwood............ Pecan......


........Maple.................Walnut.....


Help me out here, which would be the better? Vote in the poll to the right!! p.s. Walnut is the one we already tried.

Monday, January 19, 2009

Carcasses

1 comments
Yes, that's the technical term for those boxes you put all your stuff in. i.e. one carcass + one face frame = one cabinet. Maybe you pronounce it "car-case"? Either way we now have three carcasses completed. We have a very steamlined process:
  1. Layout the cuts for minimizing wasted plywood.
  2. Make cuts so that all equal dimensions are cut at one time without moving the saw fence.
  3. Drill shelf pin holes in the side pieces.
  4. Drill pocket-holes everywhere!
  5. Assemble.
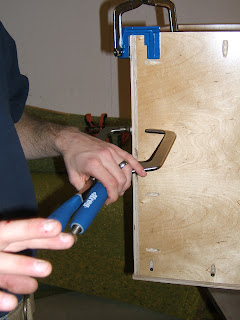
And that's it! Here's August, first with the pocket-hole jig and then assembling. Note our use of the blue-handled Kreg clamps - overpriced but really really nice.


And myself doing the Barker Beauty pose with our three completed boxes. The one on the left has no top because its the sink base. The other two sit on either side of the oven. You can also see our plastic dust barrier that is thumb-tacked to the ceiling.

Friday, January 9, 2009

A Meager Start

2 comments
Well, it may not look like much, but its as big step for the Johnson Cabinet Factory - our first prototype! Made of scrap wood and smaller than the real deal of course.. This is basically what we've got to make about 15 more times. It didn't take that long (an hour maybe?), so I'm still optimistic about finishing by the end of March.

A couple of tools we already endorse:

  1. Automatic Current Sensing Switch. These cost only $20 at Sears but good luck finding one. We found it on our 3rd try. You plug both the shop vac and your power tool into it. The current sensing part means it cuts the shop vac on whenever you cut the power tool on. Thus- a makeshift dust collection system. It even lags the shop vac on a little after the power tool to keep from tripping breakers. We successfully used it with the table saw and still didn't blow any circuits, even with our crappy 70s wiring.
  2. Kreg Jig. This is the joint of the future, folks. Serious woodworkers would look down their noses at us, but we are making almost every joint in the whole kitchen with it. Its fast and doesn't require clamping or even precise measuring in most cases. After all, as I often remind August, this kitchen is all about appearances. Of course we don't want it to fall apart either...